Personalizing Products
Introduction
SmartCanvas products can be personalized in either Single Mode or Batch Mode (depending on the product).
Personalize a Product in Single Mode
The personalization you can make to a product vary depending on the type of product and design. Some aspects may be fixed, such as elements included as part of the overall design layout. The elements you can personalize are displayed as Input form fields. Changes are displayed in the page/sheet panel as you make them:
- Text: Example text is provided to select and overwrite. Changes are displayed as they are made.
- Image: A sample image is provided, select CHANGE to:
- Upload an Image from your device.
- Drag and Drop an image from your device.
- Search for an image from a catalog of images.
- Barcodes: QR Codes can be displayed and updated when webpage, email addresses or social media references are entered to provide quick links when scanned by a device's camera. Different types of Barcode can be used, for example, for product labels or mail franking.
- Menus: Users can select from a set of fixed options to display text, images or modify properties of a product.
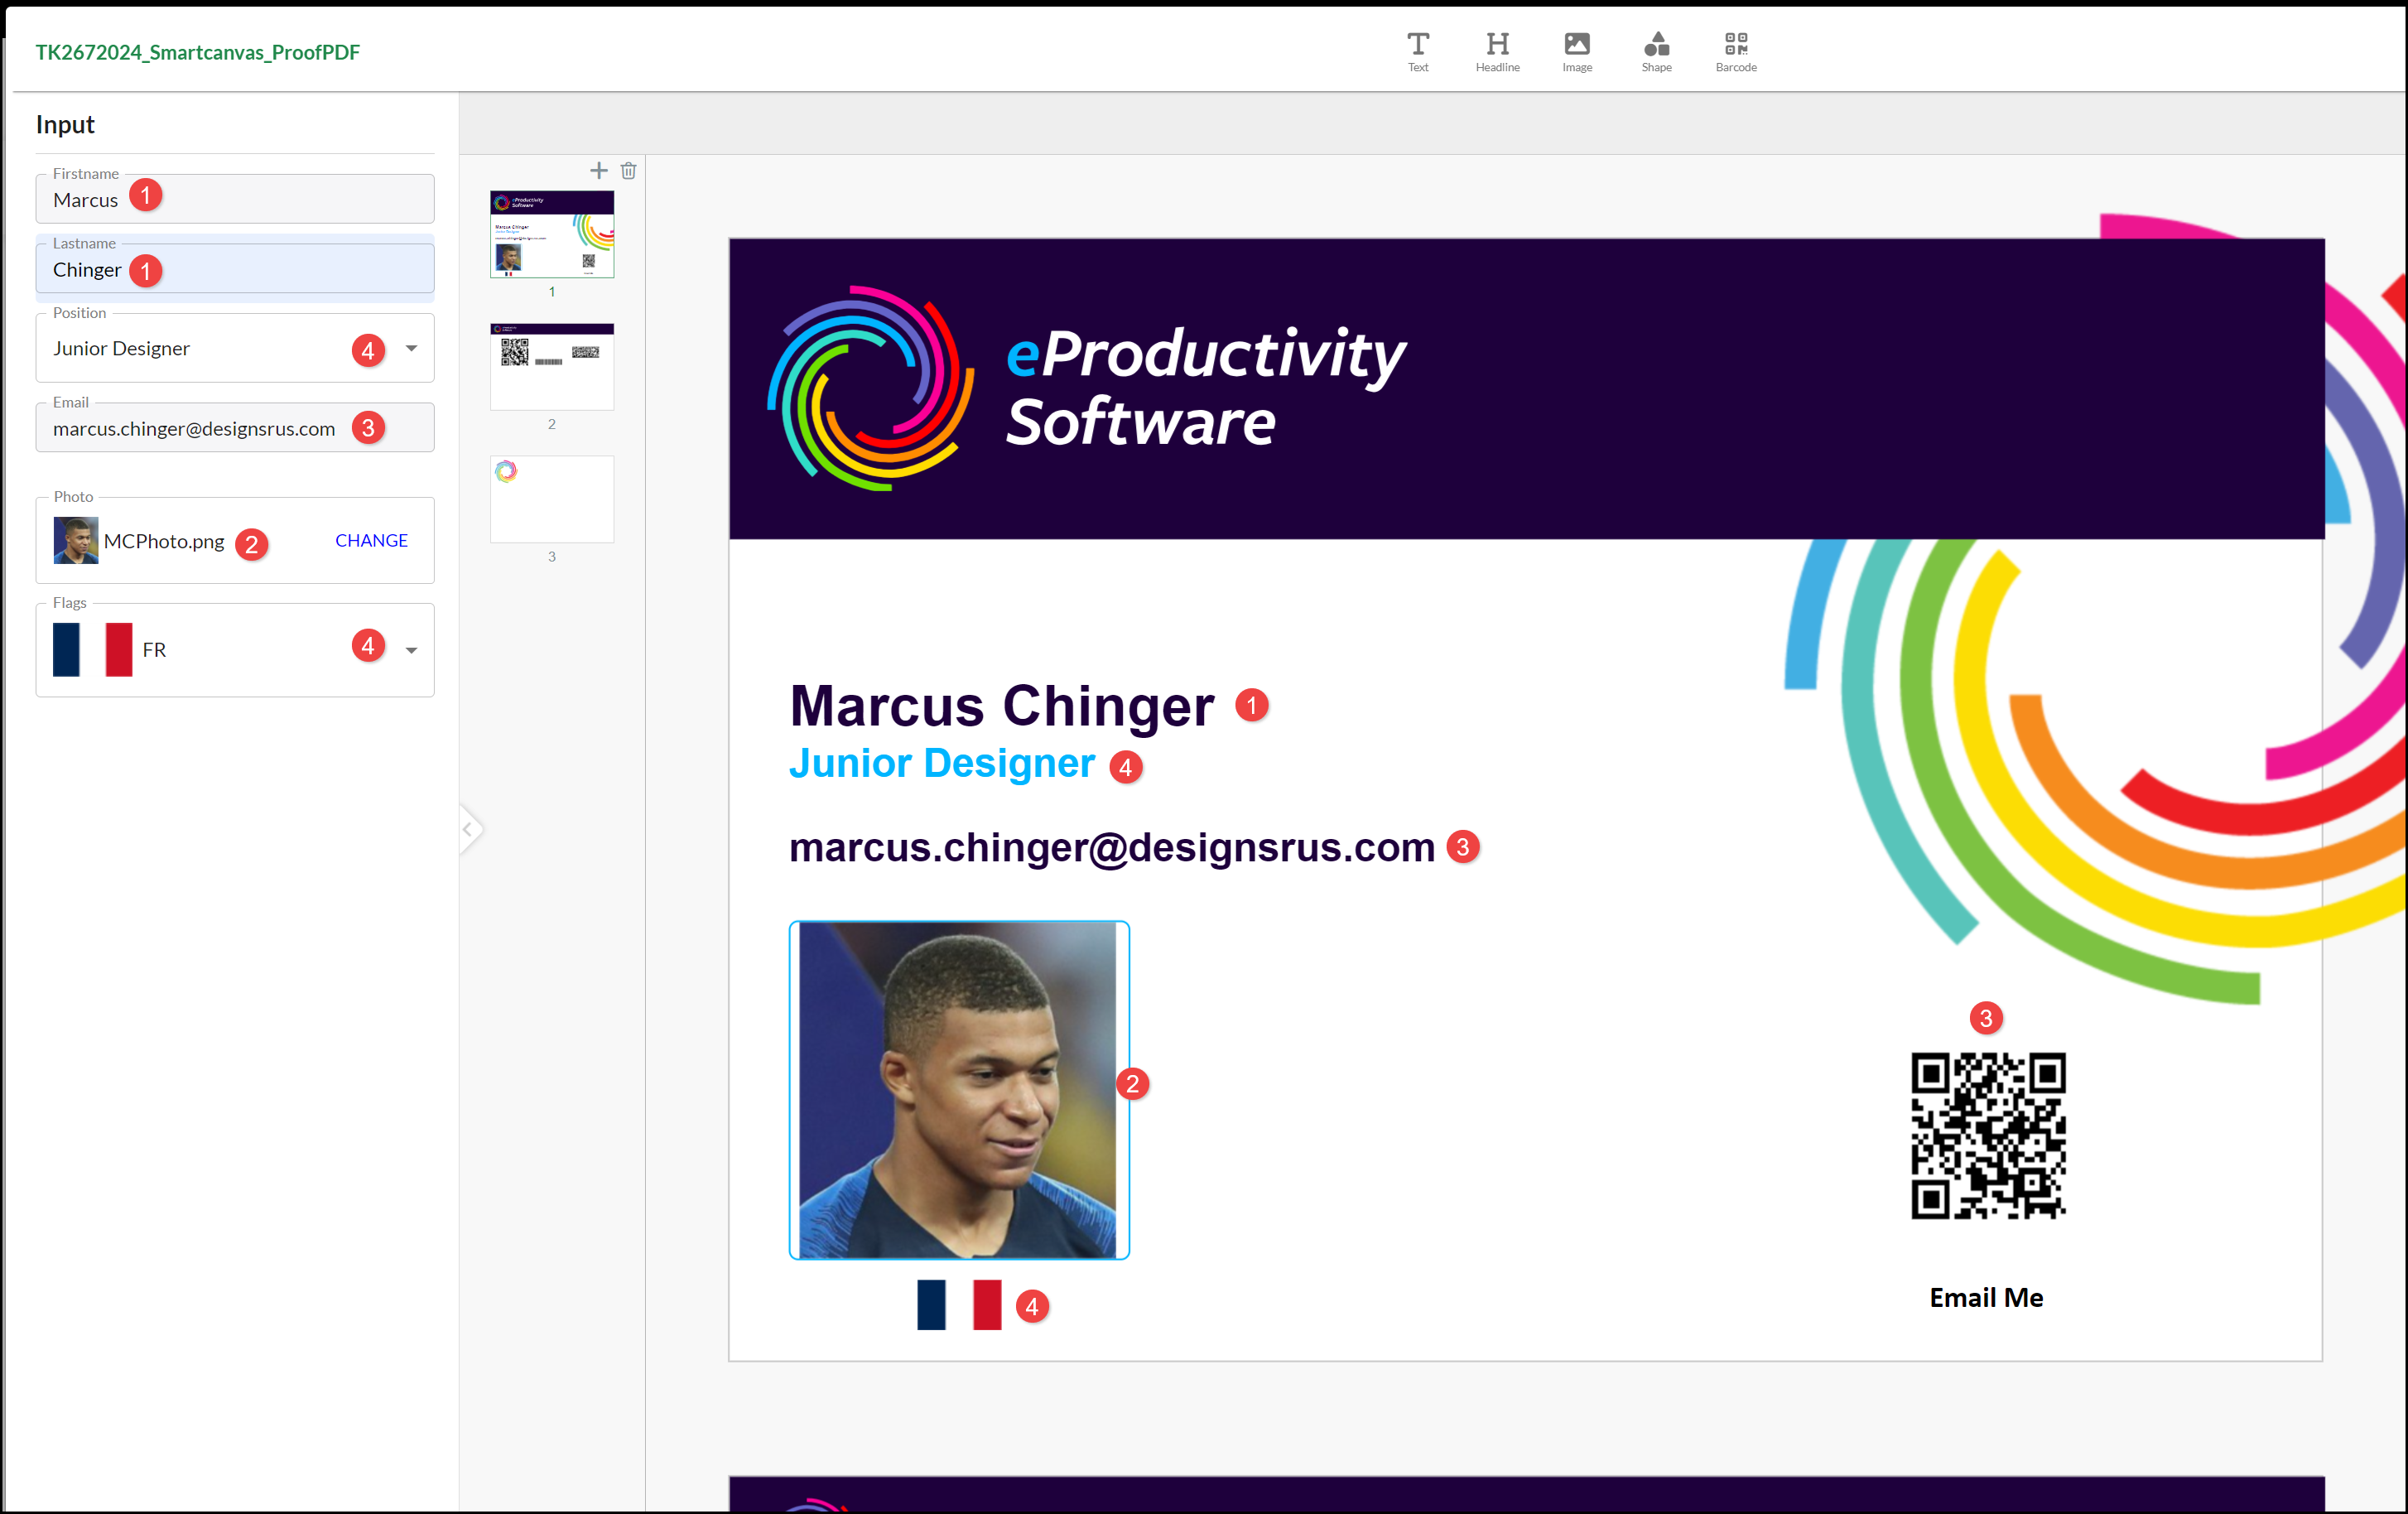
Tip: If the product includes more than one page, make sure you Personalize and Preview the Input available for each one.
Personalizing a Product in Batch Mode
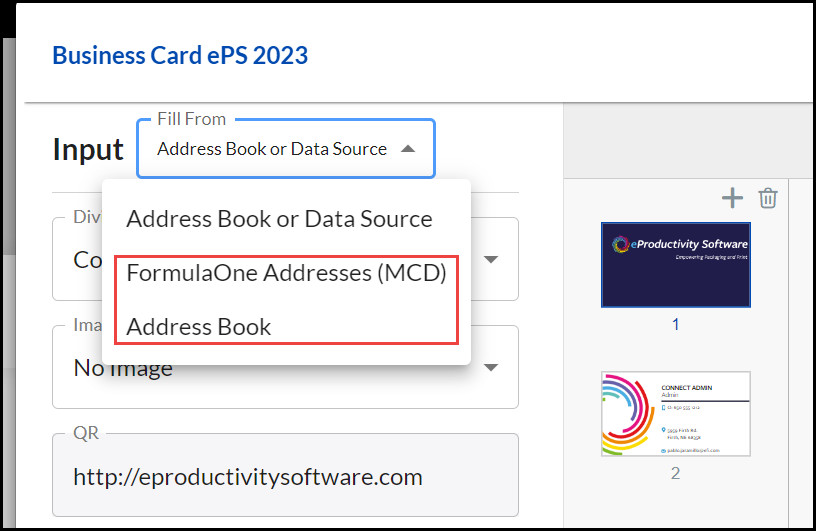
The options for uploading data to personalize your product may vary based on the type of product, for example, you may be given instructions for formatting a text or spreadsheet file to upload, or asked to paste data into a form you submit on the company's site. This may be before you personalize your product or as part of the personalization process. For example, this product provides both the option to upload either an Address Book file or add records to a Data Source file for this product on the the company's site:
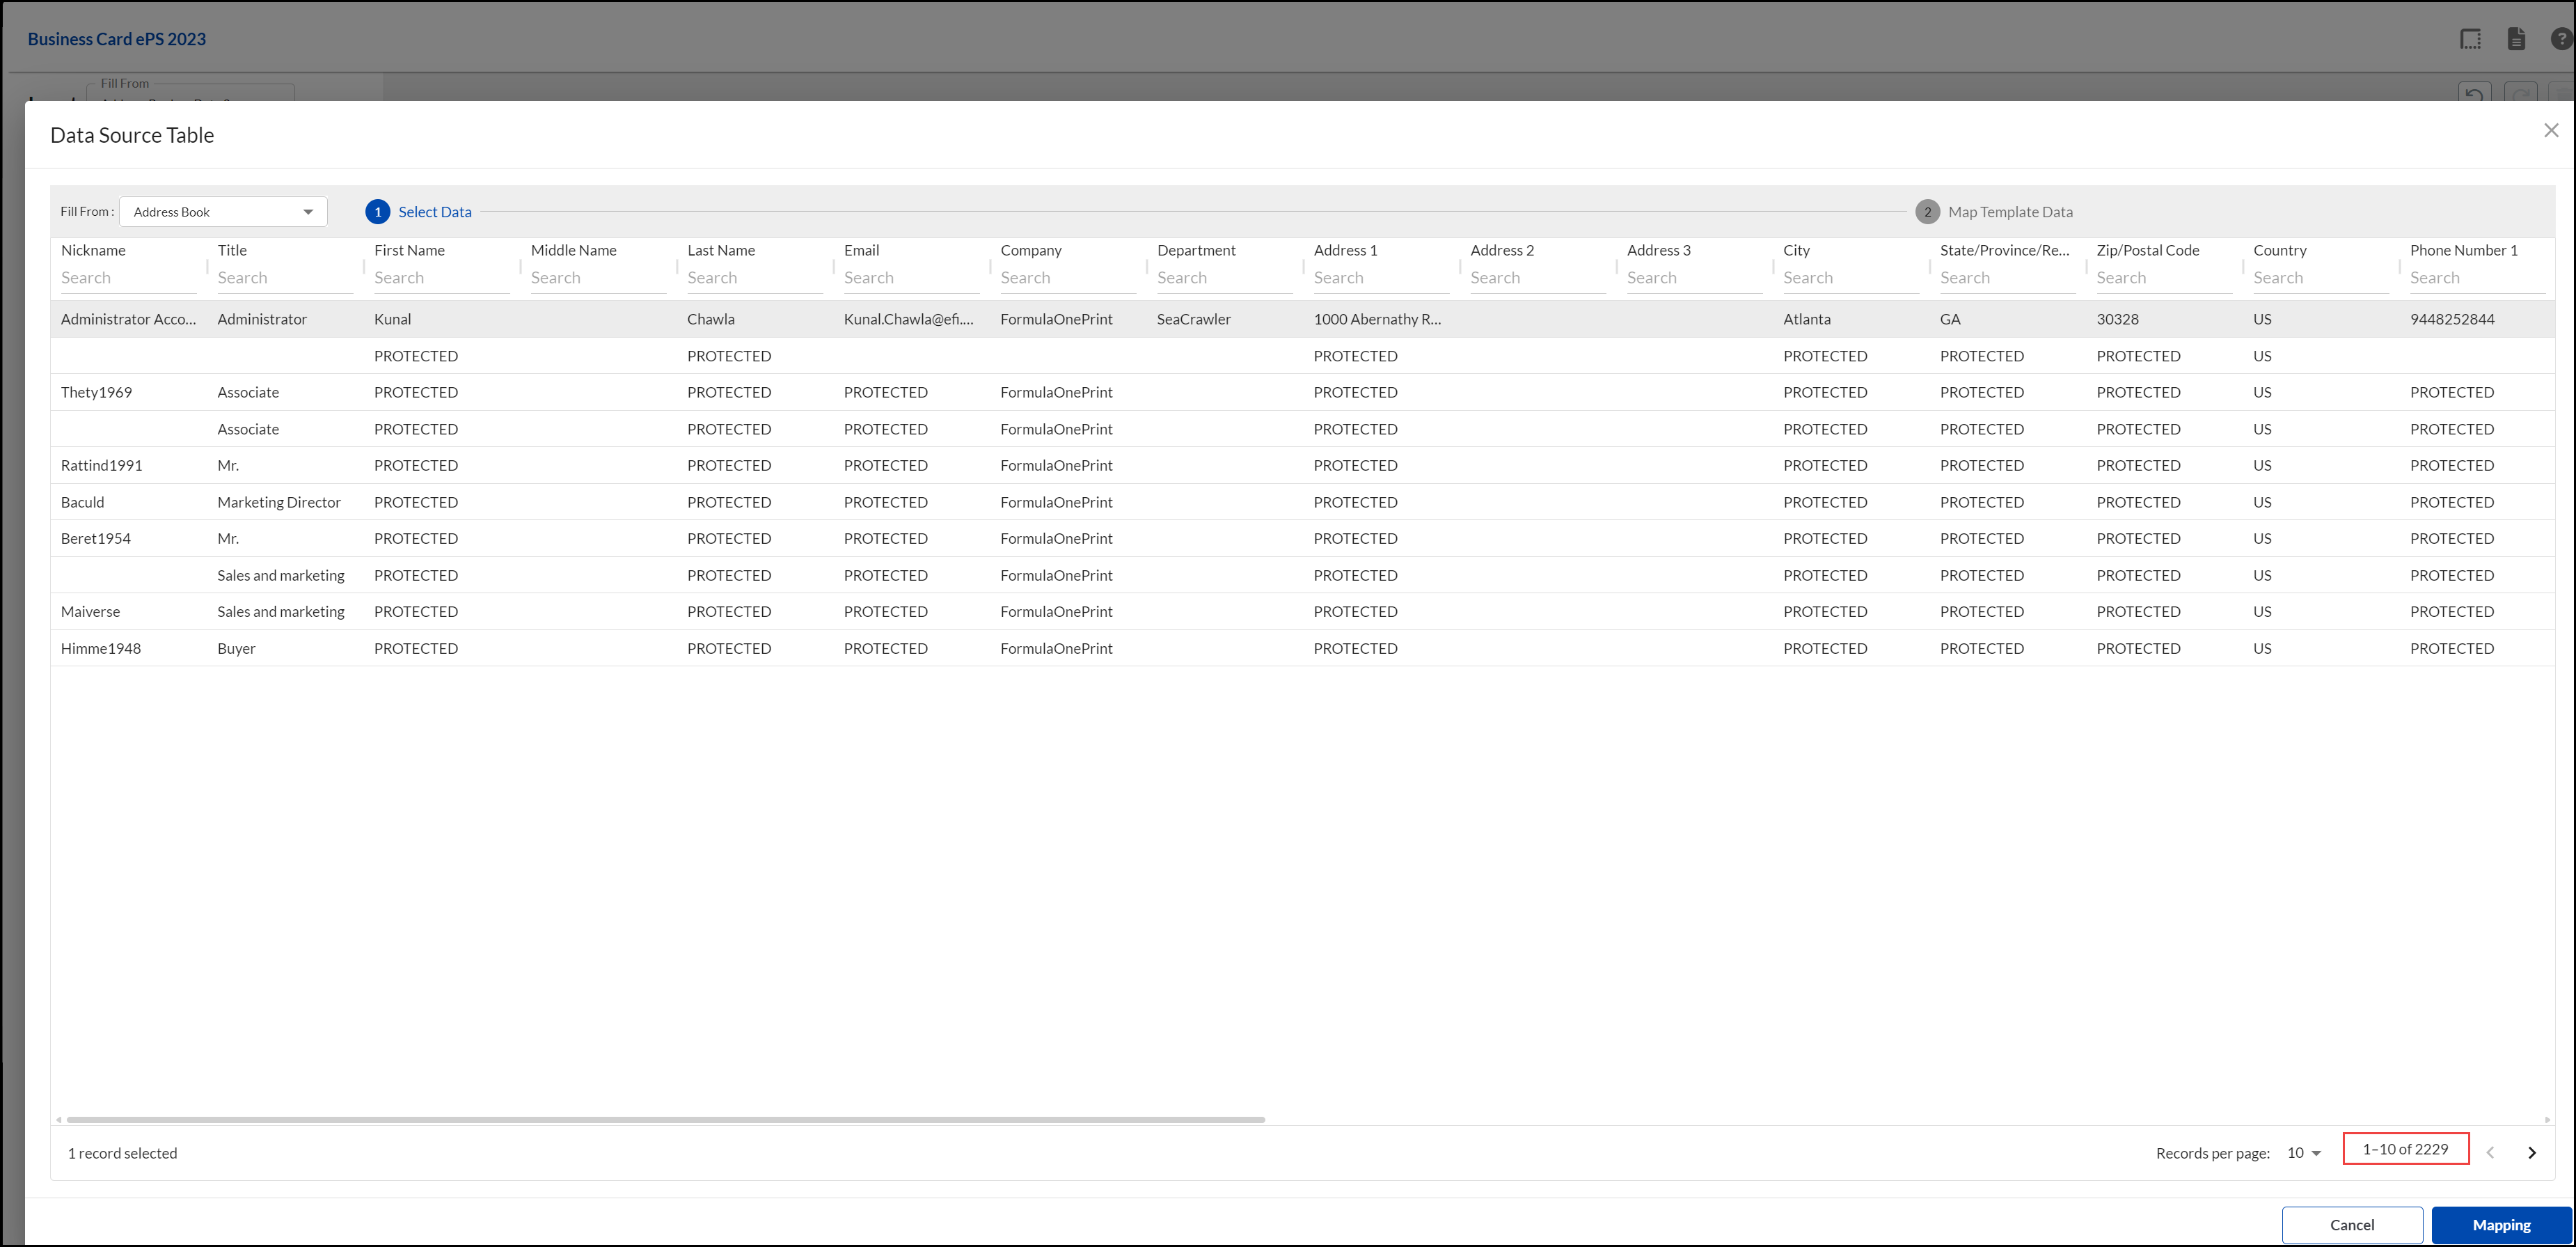
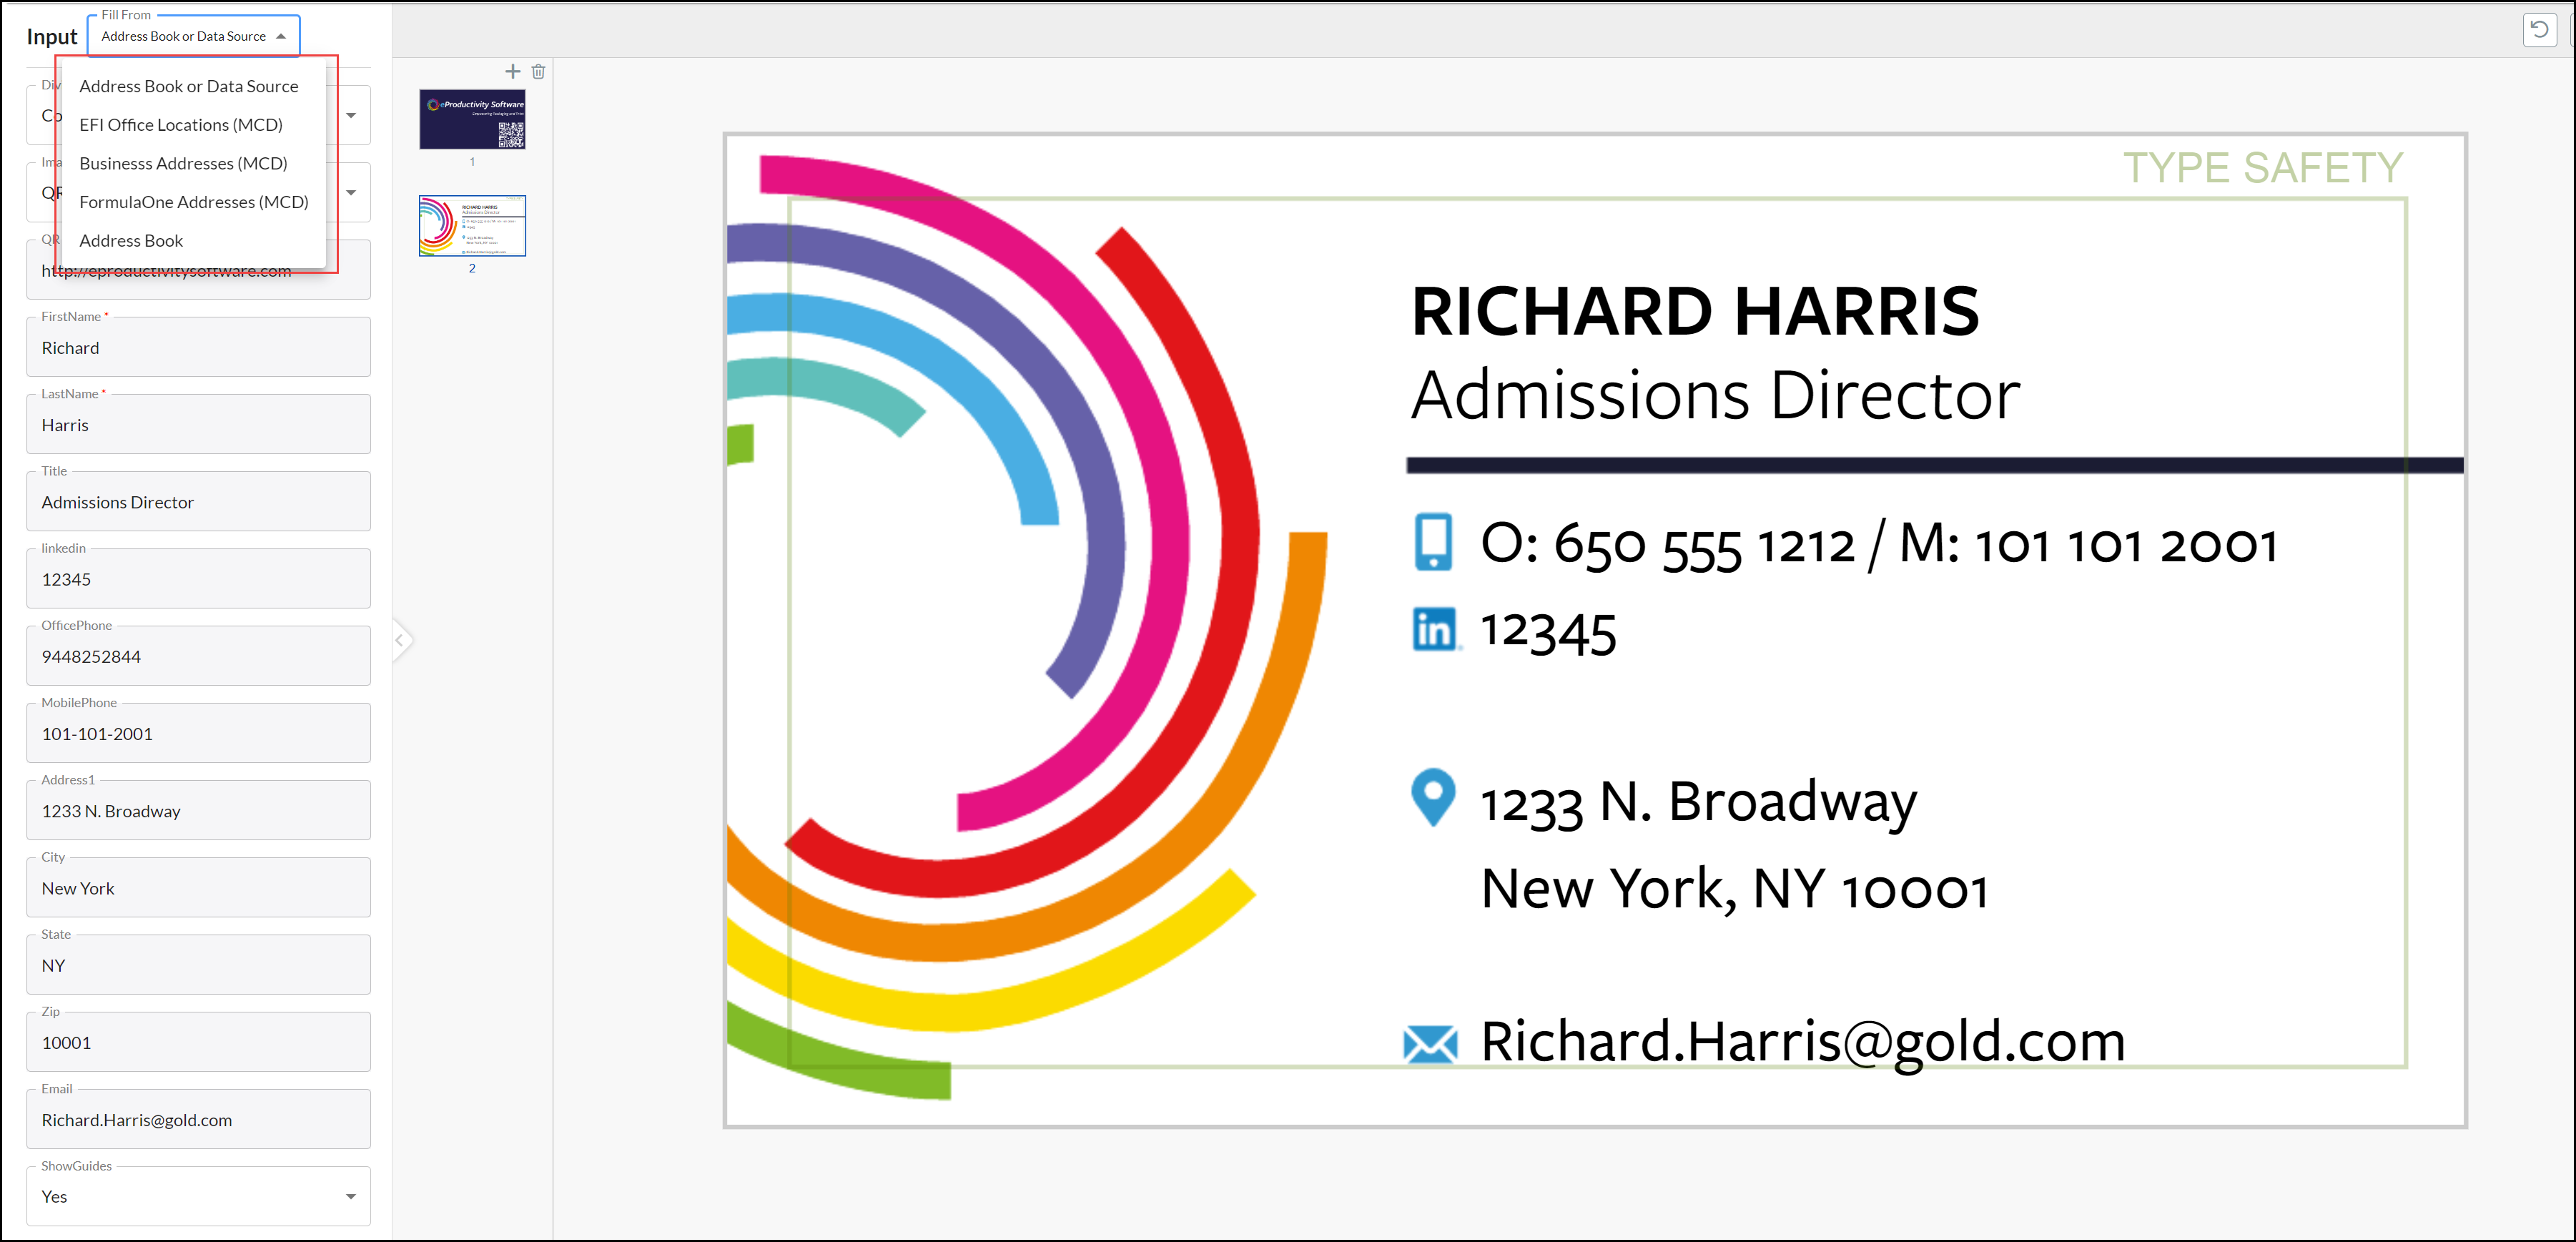
When you select the Data Source (FormulaOneAddresses) option the added records are displayed:
- Select a record to be used as a Default record when designing the product. You may, for example, choose a record with a particularly long example to see how it fits on the product media.
- Select Mapping to move to the next stage.

The Data Source Table:
- Shows the Variable Data Name for the Input to indicate what you are selecting from your data file.
- A Datasource Name menu. If you have not included that field in your records as you do not want to include it, do not Select anything.
- Select the corresponding Datasource Name field if you have included in your file.
- Sample Data is displayed from your Default record if you have selected a mapping to a Datasource Name field.

Only the fields with a selected Datasource Name are included on the product. The others remain blank. For larger Jobs you are given the opportunity to Upload a file (and follow the same process to Map your field columns). Contact the company for further information if this is not available on the store front or product screen:
Some products may require you to Upload more than one file, for example, one with Office Details, one with Employee details and one with location data:
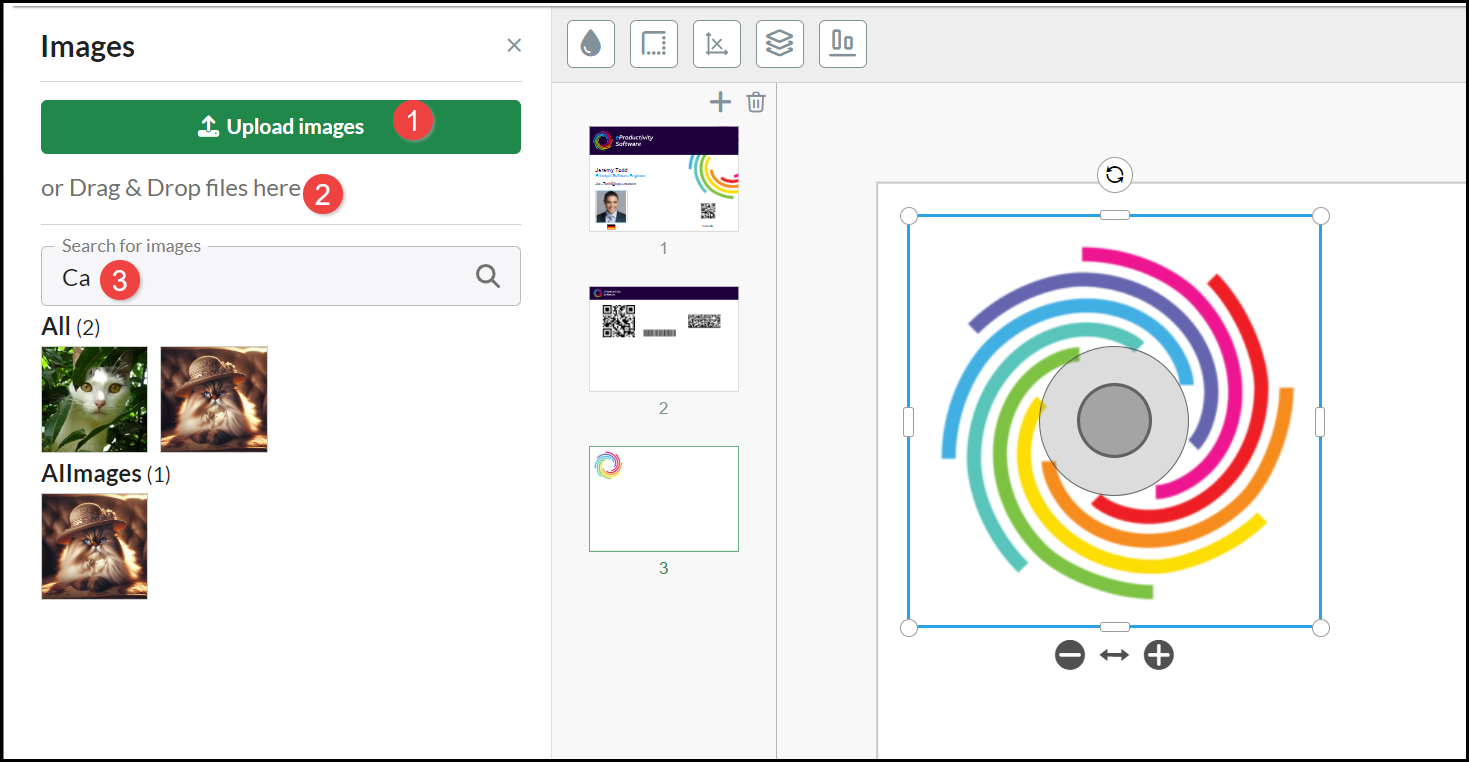
Personalizing Image Options
When you personalize images, you can select to:
- Upload images from your device. When you select an image it is uploaded into the All Images category of images.
- You can Drag & Drop an image to be uploaded into the All Images category of images.
- You can scroll the image library, using either All or within specific named Categories of images. Select VIEW MORE to see additional images within a Category. You can Search for images by entering part of an image name or a term that might identify suitable images.
Note: When you Upload or Drag & Drop images, they are only available for you to select when purchasing that particular product. No other people purchasing the same or other products have access to your images and you will not have future access to those images when creating further product personalizations.
If you upload and use an image that has a low resolution it impacts the print quality, a Warning (exclamation mark) is displayed on the image, select the image on the canvas to view more details about the warning:
- Red: very low image quality.
- Amber: low image quality.

If a warning is displayed, you should create and upload a higher resolution version on the image before finalizing the product purchase.
Some products may have Input options where you can select which personalization options to include:

See also: